
Ice dam remediation and ventilation upgrade in Halton Hills
Comprehensive remediation and attic-ventilation upgrade to protect a two-storey home from recurring winter ice damage.
- 1
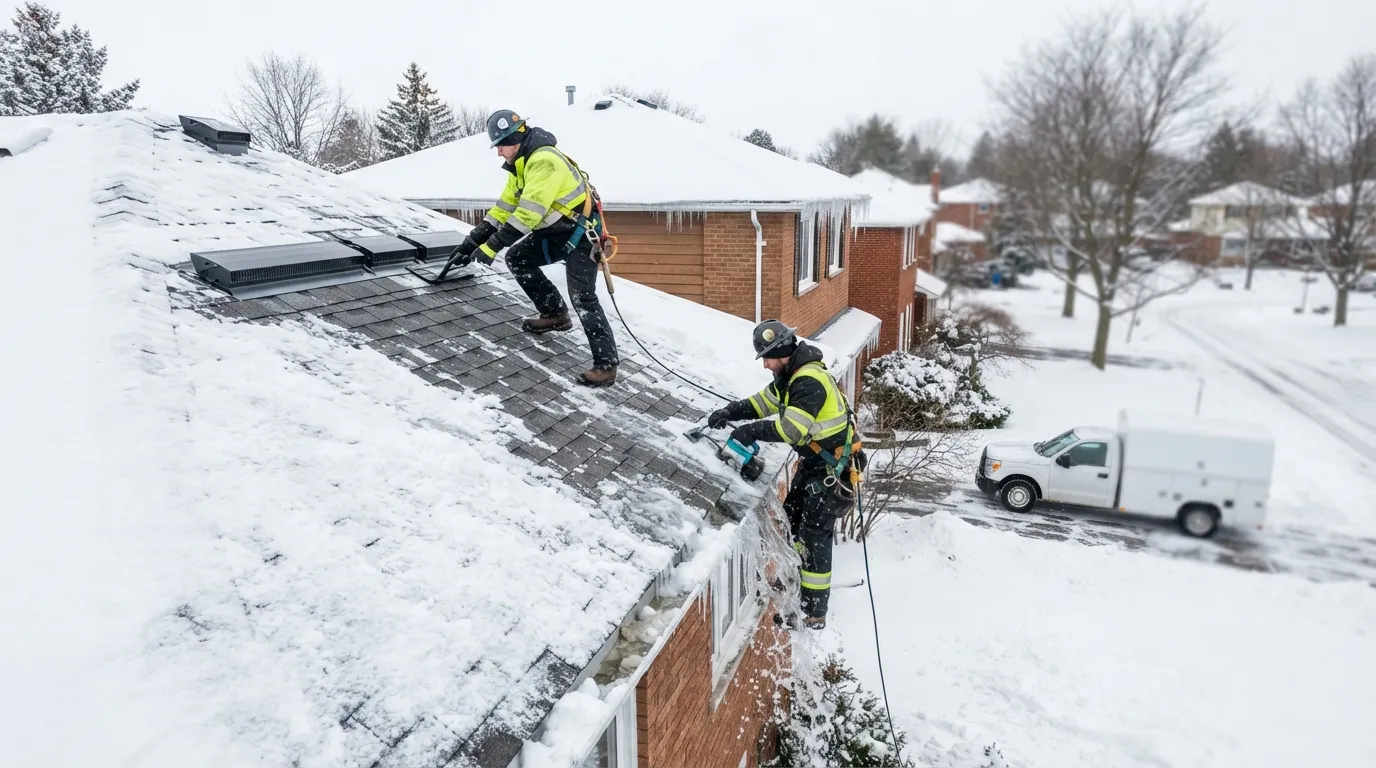
Targeted ice-dam removal and initial roof repair
We removed ice dams by mechanical de-icing and hand removal around sensitive flashings to avoid shingle damage, using heated panels and steam where needed rather than blasting salt. Damaged edge shingles and underlayment at the eaves were replaced with a 60-mil self-adhered ice-and-water shield extending 3 ft up the roof plane, meeting common best-practice guidance for cold-climate eaves.
- 2
Flashing and eaves detail upgrade
We replaced failing step and chimney flashings with 24-gauge galvanized drip-edge and custom-formed kick-out flashings, ensuring positive water shedding to the gutters. Around valleys and penetrations we installed a combination of woven valley underlay and metal flashing to meet the practical objectives of longevity and leak prevention.
- 3
Attic insulation and air-sealing strategy
To stabilise attic temperatures, we air-sealed common leakage paths — top plates, can lights and duct chases — with fire-rated spray foam and gaskets, then added blown cellulose to raise effective R-value across the roof deck. This reduced convective heat loss that contributes to roof-surface thawing and refreeze cycles that form ice dams.
- 4
Ventilation re-balance
We established a balanced intake-and-exhaust system: continuous soffit baffles to preserve inlet area, intake vents sized to code-area equivalents, and a continuous ridge vent (weather-protected, high-flow polymer ridge) sized for the home’s roof area. The solution follows the principle of 1:300 or 1:150 net free ventilating area guidance when paired with proper insulation, depending on the specific roof assembly.
- 5
Final roof finish and quality control
Where shingles were replaced we specified architectural laminated asphalt shingles matched to the existing colour and manufacturer, installed with 6‑nail pattern in high-wind zones and corrosion-resistant stainless or hot-dipped galvanized fasteners. A post-work thermal scan and a second attic inspection confirmed even temperature distribution and proper airflow before handover.
Frequently Asked Questions
How long does ice-dam remediation and a ventilation upgrade usually take?
A focused remediation on a two-storey Halton Hills home typically takes two to five days, depending on the extent of damage and weather. Seasonal factors like heavy snow or deep freeze can extend timelines; we plan work windows and logistics accordingly.
Will this work disrupt daily life?
We stage work to limit disruption: noisy tasks are scheduled and material deliveries are consolidated. Most homeowners remain in their homes while we complete the attic work, though temporary access restrictions to the yard under ladders are required for safety.
How do I know when an attic needs this kind of intervention?
If you see ice forming along eaves each winter, water stains on ceilings, or uneven attic temperatures on a thermal scan, those are reliable indicators. Regular inspections and a simple moisture/thermal assessment can confirm whether air sealing, added insulation, or ventilation re-balancing is needed.
Does Halton County building code affect the ventilation solution?
Local code and best-practice principles inform vent sizing and fire safety for attic air-sealing, but solutions are tailored to the specific assembly and roof area. We document calculations and specify code-compliant materials so the work aligns with Halton County expectations.
A quieter winter for your Halton Hills roof begins with a careful plan
Email us to arrange an inspection tailored to Halton Hills and surrounding communities; we’ll document the problem and propose a long-lived solution.
Get a Free Quote